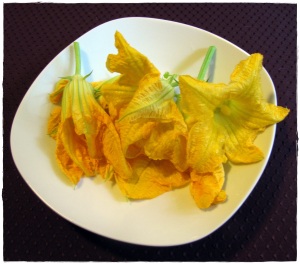
Well, pumpkin blossoms, to be more accurate. This year our pumpkin plant is out of control. Its vines must run at least 16 feet along our garden fence, and everyday we see more beautiful bright orange blossoms opening and begging for attention.
Eventually I noticed that only some of these blossoms were turning into actual pumpkins. I knew squash blossoms were edible, but hesitated to gather them for fear that I would be stealing one of the few blossoms that actually bore fruit. So, I did a bit of research. It turns out there are two types of blossoms on the same plant, male and female, and only the female blossoms bear fruit! So, how do you tell the difference? The female blossoms will already have a miniature version of the squash at their base. Check out pictures here:
Male and female squash blossom pictures.
I’ve also noticed that male blossoms tend to stick straight up along the vine, while females will more often aim downward.
Since learning to gather only male blossoms, I have been going squash blossom crazy this summer! I add them to sautés and soups, put them in quesadillas, steam them and serve lightly salted, and of course, stuff them. I have perfected my stuffed quash blossom recipe this summer, so here is the step-by-step to making amazing stuffed squash blossoms.
Ingredients
- about 8 squash or pumpkin blossoms
- 1 egg
- 1 cup fresh mixed herbs, chopped
- 3 oz goat cheese
- 1/4 cup shredded mozzarella
- 1 tablespoon olive oil
To be honest, I’m a very intuitive cook and never really measure anything. But if you stick to these basic ingredients and ratios, with a dose of your own intuition, you will end up with something delicious.
Gathering the Blossoms
Now that you know how to tell male from female blossoms, it’s time to gather them. Every few days we’ll have several blossoms blooming at once, and I generally wait for one of these days to do my gathering. It’s best to pick the blossoms in the morning, when they are in full bloom, as they tend to wilt and close down later in the day. And, the blossoms only bloom for a day, so don’t expect to go back for the same blossom the next day. Also, make sure to leave a few blossoms for pollination–the girls do need a few boys!
To pick each blossom, simply cut the stem an inch or so below the blossom. Wear gloves or a long sleeved shirt if you have sensitive skin, because squash and pumpkin plants are prickly.
Preparing the Blossoms
It’s easiest to prepare the blossoms immediately after picking them, when they are still open. They will close up after a few hours, which makes preparation more difficult, though still doable.
After gently washing the blossoms, reach in and pinch off the stamen. It’s fine to leave the stems on because they are completely edible, and are actually one of my favorite parts once cooked!
Making the Filling
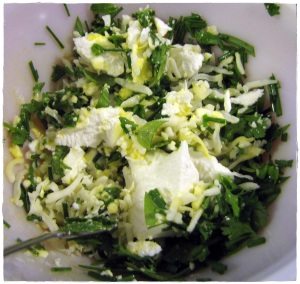
To make the filling, first add the egg to your mixing bowl and stir with a fork to break the yoke.
Next, stir in the chopped herbs. I’ve tried all different combinations here, usually some variation of chives, basil, parsley, and tarragon, and every time has been delicious. My favorite by a margin though was 2/3 cup chives and 1/3 cup tarragon. Amazing.
Now stir in the cheese. I like to use coarsely chopped goat cheese and mozzarella, though feel free to experiment with your own favorites.
Once all the ingredients are mixed, the filling should have a thick, malleable consistency.
Stuffing the Blossoms
Now for the fun part. First, prepare a baking dish by placing a small amount of olive oil in the bottom. You will gently coat the blossoms in olive oil as you add them to the dish. Next, preheat the oven to 350 degrees.
Take the first blossom and gently open its petals. you can use a spoon to scoop in the filling, but I find it’s easier just to get messy and use my fingers. I grab a small bit and gently press it into the blossom until it’s almost full, then gently close the petals again, pinching them together at the top.
Once the blossom is stuffed, roll it in the olive oil and line it up in the baking dish.
Baking
Once the blossoms are ready, bake at 350 degrees for 15-20 minutes. You’ll want the filling to cook, but the blossoms to retain their delicate taste, so make sure to take them out before the blossoms turn brown.
Now you’re ready to serve. Enjoy!


